Have you ever spent a bunch of time working on something, based entirely on written or spoken instructions from your client or boss, only for them to realize at the end that it wasn’t what they had in mind? Of course, you did, we all did. It’s very frustrating, and, most of the times, it wastes everybody’s time completely unnecessarily. But don’t worry, wireframing can solve this!
It’s such a notorious part of a designer or developer’s process that people actually started looking at it as normal. Well, it might as well have been normal a few years ago, when wireframing wasn’t a thing, at least not for digital apps, but now that it is here, there’s no reason not to use it.
Introduction
Project wireframing helps you save precious time when designing anything in your applications or websites. We’re not talking visual design (styling) work here, we’re talking structure (layout) and components.
Project wireframing is a very minimalist technique of design. You can use it to layout entire websites, but it can also work on tiny components. Think of it as the pencil sketch version of a website or component, only digital and way easier to achieve and edit.
You can also think of wireframes as blueprints. We can learn so much from architects, especially the fact that they don’t start developing anything until they establish the blueprint.
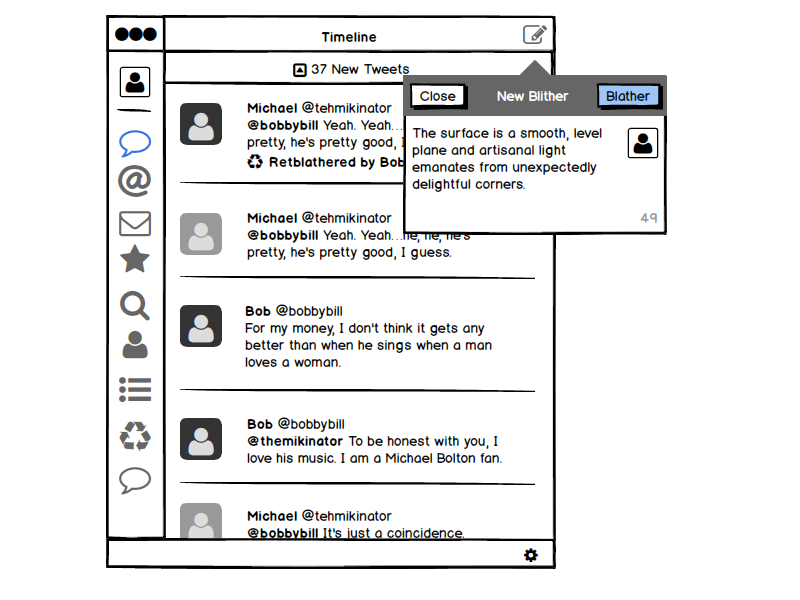
Here’s an example of Twitter’s mobile app as a wireframe:

That was achieved through a drag & drop software (which we’ll talk about a bit later) in under 30 minutes. It might seem complex, but once you understand how these types of software work, you’ll be hooked.
Think about how much time you would spend to actually implement that interface, completely designed, only to find out that something isn’t in the right place. That will take a few solid hours.
Now, imagine instead that you take that wireframe to your client, in record time, and they say: “No, no, no, by simple sidebar I meant no icons, not a small width with just icons.” In the actual design, you’d spend time ditching the icons, that you probably spent some time choosing, for different real-world scenarios, and replace them with text. In the wireframe, you simply delete them and replace them with text, then make that container wider. Because actually designing something constrains you to style everything to looks like in the final version, but with a wireframe, the client understands that this is just a general idea and you’re trying to establish the layout alone.
Wireframing Solutions
You might be wondering how does this actually work. Well, it’s actually a battle out there to create the best wireframing piece of software, so I’m going to present you the best of them right now.
Whimsical Wireframes
This is by far the most recommended app for wireframing something on the Reddit UI, UX and development communities.
You can create up to 4 projects with the free version, or choose from one of their plans to create unlimited ones.
Balsamiq Mockups
This has been used to create the Twitter wireframe above.
Their pricing can be found here.
MockFlow
Their pricing can be found here.
Moqups
This can be used in the browser, you don’t have to download anything else.
Their pricing can be found here.
Wireframe.cc
This is a stripped down version of the others, it can also be used in the browser, and it also features a pretty good free-tier plan.
Draw.io
This one is completely free, and it integrates with Google Drive and OneDrive for saving the files. Its design mirrors Google Drive’s design, and that makes it a little bit more familiar for people who used that a lot.
How To Use
All of the aforementioned solutions feature tutorials and documentation on how to use them. Simply enter their website and start learning!
Furthermore, if you learn to use one of them, you basically learn to use all of them. Some might have features that the others don’t, but the basic functionality is the same in all of them. You create blocks and add text, images, buttons, tables, etc.
After you’re done wireframing, you simply export the project in your preferred image format and send it to your client. Some of them actually let you email the project to any email address.
Conclusion
If you’re having trouble understanding anything here, please leave a comment and I’ll be happy to assist you. Don’t let any details out, regardless of how irrelevant they might seem. If you don’t want you question to appear publicly, consider contacting us through our Contact page.

